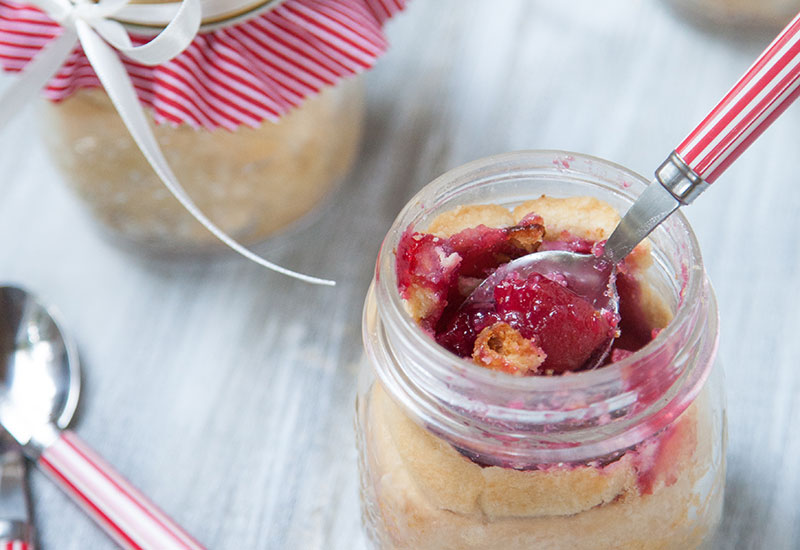
Sweet Cherry Pie in a Jar
Cherry pie just got sweeter with this cute sweet cherry pie-in-a-jar recipe. These make great homemade gifts!
Prep Time: 1 hour
Cook Time: 1 hour
Servings: 4 Pie Jars
Ingredients:
For the filling:
1 1/2 pounds fresh Stemilt cherries, stemmed, pitted, halved (about 5 cups halved)
1/2 cup water
2 tablespoons freshly squeezed lemon juice
3/4 cup granulated sugar
4 tablespoons cornstarch
For the pie crust:
2 1/4 cups all-purpose flour
8 ounces (2 sticks) salted butter (or vegan buttery sticks)
1 to 2 teaspoons granulated sugar, as preferred (I used 1 teaspoon), plus additional for dusting pies
1/4 cup ice water
1 teaspoon melted butter/vegan buttery stick (approximate), for brushing crusts
Special materials:
4 glass, home-canning jars with lids (approximate 8 to 8.5 ounce size with straight sides)
Fabric, ribbon, scissors, stickers, tags for packaging (optional)
Preparation:
Place a sheet of wax paper over prep board, to cover, and top with a couple layers of paper towel. Place halved cherries in a pot set over medium heat. Add water, lemon juice and sugar; stir to combine. Bring to a simmer and let cook for about 3 minutes, until cherries have softened a bit and sugar has melted. Add cornstarch and bring mixture to a boil; reduce heat and simmer for about 3 to 5 minutes, until thickened. Remove from heat and set aside.
Now, you’ll make the crust. Combine flour, butter and sugar in the bowl of a food processor. Pulse a few times to combine. Add water and pulse a few more times, until mixture begins to hold together.
Transfer dough to a lightly floured work surface and shape into a large round, then roughly divide round into quarters. Shape each quarter into a round disk and wrap each in plastic wrap (or plastic baggies). Dividing the dough into quarters just allows you to better apportion it among the 4 jars. Refrigerate dough for at least 30 minutes before using.
Once chilled, place one disk of dough onto a lightly floured work surface and roll out to an approximate 1/8″ to 3/16″ thickness. From this first round of dough you will cut 4 “base rounds” of dough to be used in the bottoms of each of your jars, and 4 “cap rounds” to be used as the top crusts for your “pies.”
Start by placing a “base round” in each of your 4 jars. Then working with one jar at a time, cut a manageable piece of dough from what you have left over from what you’ve rolled out and start lining your jar. (Tip: begin working from the base upward and make sure that the first pieces of dough you place to line the “walls” of your jar overlap the base round just a bit so that you can seal this seam.
Line your jars to just past what would be considered the top fill line so that you can more easily seal this edge to the top crust.
Using a teaspoon, fill each jar with your cherry filling to just about 1/2″ below that top fill line mentioned above. You want to leave a little of the pie dough peeking up from your filling (to seal with your top crust).
Then, top each of your pies with one “cap round” of dough (cut earlier and set aside). Working with one jar at a time, carefully nestle round of dough down into the mouth of the jar, pushing the center down gently and easing sides down to meet your “liner” dough (the outer edges of this “cap round” of dough will fan up a bit as you nestle it into your jar). With your fingers, press this “cap round” to “seam” with the top edge of dough that lines your jar. This will help to seal in your filling. Then press down the excess dough that might still be fanning up from this top round, to create a little edge to your crust. Once completed, use a fork to press and pattern this outer edge and make a few “steam” cuts in top crust. Brush lightly with melted butter and sprinkle with granulated sugar.
Preheat oven to 275 degrees F. Place jars on a baking sheet. Bake for 5 minutes, then increase heat to 375 degrees F. and continue baking for another 35 to 40 minutes, until top crusts are golden. If tops begin to brown too quickly, simply cover lightly with a small square of aluminum foil.
Serve warm, or cap with lids and keep for later. Enjoy!
Recipe and photo provided by Stemilt World Famous Fruit


