Celebrate the Season with Spring Pavlova
This recipe and photos were provided by Sally Roeckell of Table and Dish and were originally published at 365Barrington.com.
A Pavlova is always a show stopper, even though it is a simple rustic meringue that has only a few simple ingredients. I first learned how to make Pavlovas in France about five years ago. It was a great place to learn as the bakeries are teaming with them in all sizes, from bite-sized to really gigantic cookies. I knew I had to bring this recipe home and make it often. I’ve made many Pavlovas over the past few years. My daughter regularly requests it as her birthday “cake.” It has become my go-to dessert. Easy to make ahead and finish just before you need to serve it, making it perfect for in-laws and neighbors that drop by or something special to bring to a friend, dinner party or pot luck.
Great news! It’s gluten-free, so it is always a good dessert to serve if you have a friend or family member who follows a gluten-free diet. My gluten-free friends always appreciate when they can indulge in what is being served without having to have an alternative option.

At first glance a Pavlova might seem intimidating. It’s not! Aside from being super gorgeous, it is super easy to prepare. As long as you know what to look for and follow a few simple tips, your guests will be totally impressed.
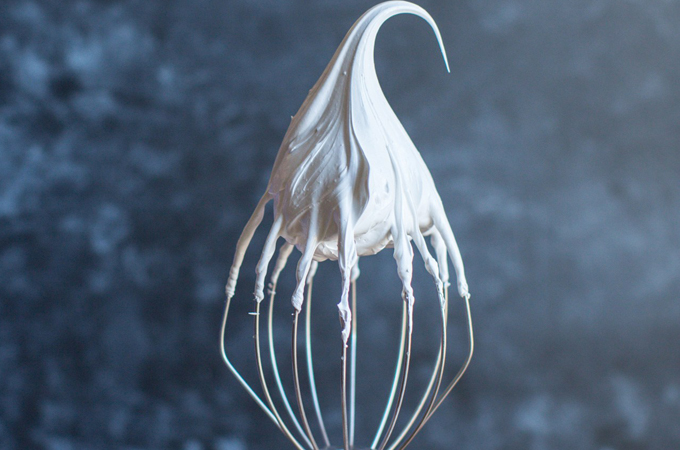
You will know you’ve allowed the mixture to whip long enough when you can see a stiff peak as you pull the whisk attachment out of the mixture and turn it upside down.

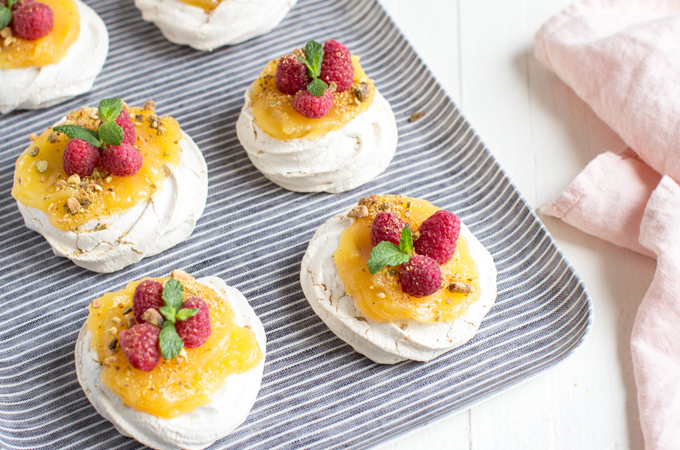
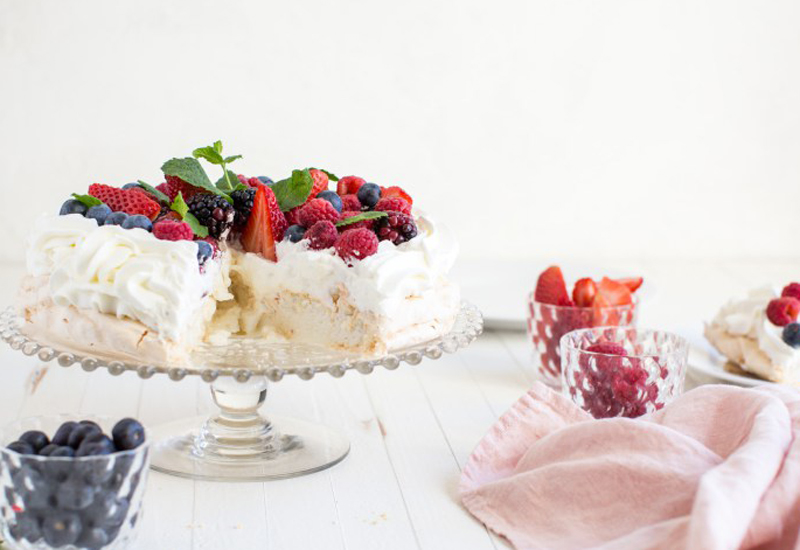
This is a dessert that is easy to make in all sizes. The cook time only varies by a few minutes. Even the small ones take about an hour in the oven. Watch them – if they start to form a crusty exterior and crack a bit, they are done. Once cooled to room temp, it’s time to add your toppings. Go crazy, let the kids choose. I’m a huge fan of lemons in all forms! The outside of the Pavlova is crunchy and the inside is chewy and sweet. The fresh cream or lemon curd adds a smooth texture and the result is a light, delicious treat.
Spring Pavlova
Ingredients
For the Pavlova
- 6 egg whites, room temperature
- 1 1/4 cups white granulated sugar
- 2 tsp corn starch
- 1/2 Tbsp lemon juice
- 1/2 Tbsp pure vanilla extract
For the Cream
- 1 1/2 cups cold, heavy whipping cream
- 2 tbsp white granulated sugar
For the Topping/Decor
- 4-5 cups fresh fruit
- Try kiwi, blueberries, raspberries, sliced strawberries, fresh figs + honey, lemon curd+ pistachios, bananas + passion fruit, etc.
- Mint leaves for garnish (optional)
- For a REALLY delicious option, skip the whipped cream and fruit and serve the crusty exterior, chewy interior Pavlova with a scoop of your favorite dark chocolate ice cream. I’m a fan of Jeni’s Darkest Chocolate ice cream. Seriously it’s called “Darkest Chocolate” – enough said, right!?
Method
- Preheat the Oven to 225˚F. Line a large baking sheet with parchment paper
- Using your stand mixer, beat 6 egg whites on high speed until soft peaks form.
- The trick to the perfect Pavlova is making sure you whip enough air into the egg whites, so if you start with a bowl that’s even a little bit wet or contains even a trace of oil, the egg whites won’t aerate properly and the pavlova will sink in the middle. Avoid using a plastic bowl since plastic can absorb oil. Glass bowls are best, and metal bowls work well too.
- When you’re separating your egg whites from the yolks, make sure the yolks are intact. If any yolk gets into the whites they won’t aerate properly and you’ll have a hard time achieving the correct consistency for the meringue mixture .
- When you notice the egg whites have become quite foamy, begin to add the sugar very gradually, 1/4 cup at a time and beat 10 min on high speed, or until stiff peaks form. It will be smooth and glossy.
- You will know you’ve allowed the mixture to whip long enough when you can see a stiff peak when you pull the whisk attachment out of the mixture and turn it upside down, and when you’re able to rub a small amount of the mixture between your fingers and it feels smooth (no grains of sugar present). Don’t stick your finger directly into the mixture! Your skin has oils on it that can affect the texture of the meringue so it’s best to grab a clean, dry spoon and grab a bit of the mixture that way so you can rub it between your fingers.
- Use a spatula to quickly fold in 1/2 Tbsp lemon juice and 1/2 Tbsp vanilla extract, then fold in 2 tsp corn starch and mix until well blended.
- Pipe meringue onto the parchment paper using a Wilton 1M Tip. or for a more rustic pavlova simply drop the egg and sugar mixture onto the parchment and shape with a off set spatula. Using the spatula, pull up the sides of the pavlova in a swirling motion to create a very shallow “crater” in the middle. This will help it keep its shape during baking. It may be tempting to shape the pavlova with a larger diameter than 8 inches, pavlovas can be made in any size but try to keep it small and tall. This will create a more impressive appearance and ensure there’s a thick layer of that delicious marshmallowy interior!. You can trace circles onto the back side of your parchment paper as a guide to keep your pavlovas uniform size.
- Bake at 225˚ for 1 hr and 15 min. your pavlova will not over-bake unless it starts to brown. Some recipes call for a higher temp. I find 225-250 good any hotter and it can start to brown before it cooks internally. Because this recipe can be effected by humidity check your pavlovas, if they still feel gummy after the allotted time add 10-15 minutes and keep an eye on them. You want a crisp outer shell as it cools with a marshmallowy (is that a word) center.
- Turn the oven off and without opening the door, let meringue in the hot oven another 30 min. Outsides will be dry and crisp to the tap and very pale cream colored and insides will still be marshmallow soft.
- The real danger is in under-baking as this will cause the pavlova to remain raw in the middle and collapse as soon as it begins to cool. After the pavlova has finished baking turn the oven off and crack it open with a wooden spoon, allowing the pavlova to cool inside the oven. This will help it maintain its shape and allow the outer “shell” that develops to protect the marshmallowy interior.
- Transfer the pavlova with the parchment paper onto the counter or a cookie rack and allow it to cool to room temp. Once cool, you can top them with whipped cream and fruit or store in an airtight container for 5-7 days at room temperature. Once they are assembled they stay great for up to 4 hours at room temperature.
How to Make Frosting
- Beat cold whipping cream with 2 Tbsp sugar in the cold bowl for 2 to 2 1/2 minutes or until whipped and spreadable. Be careful not to over beat the cream. I’m often guilty of this and have to start over. You want your cream to be creamy not broken and gritty. Were not making butter, we’re making delicious whipped cream.
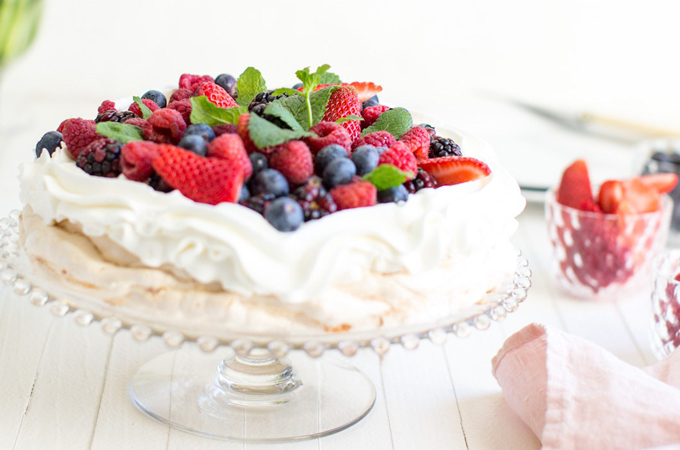
- Pipe frosting onto the pavlova and top with fresh fruit. It’s pretty in a piping bag but if you don’t have one simply top it as you would frost the top of a cake.
- Top with your choice of fruits, ENJOY!


